SLA 3D Printing Design Tips!
November 7, 2008 – It’s 3D printing week here at HLH. All week long we are posting videos, tips, articles…all 3D printing focused, all to help you with your current or upcoming 3D printing projects.
SLS Rapid Parts @ $o.3/Gram (USD) – FreeQuote@HLHPrototypes.com to start your project review.
SLA Rapid Parts @ $0.25/Gram (USD) – FreeQuote@HLHPrototypes.com to start your project review.
If you are not sure which process is the right 3D printing choice for your next project then our team at HLH will be happy to review your project with you. For now, here are some SLA design tips to help you design an awesome part.
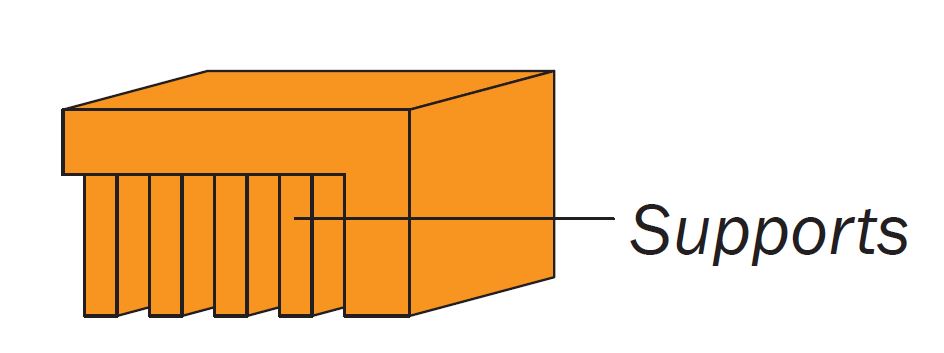
Overhangs – not a problem for SLA due to the supports. Unsupported overhangs will warp.
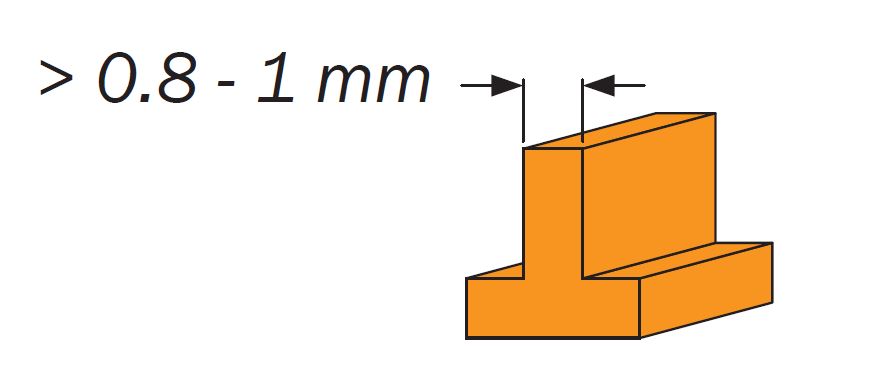
Walls – SLA can manage very thin walls but HLH do not recommend anything under 0.8 – 1mm.
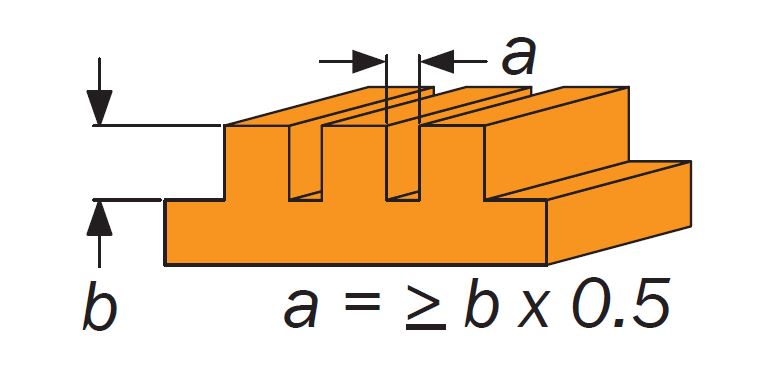
Holes & Slots – we recommend a minimum of 0.5mm but the larger the better especially as wall thickness or depth increases.
Follow these design tips and other design tips coming up to achieve a part design that is well suited for 3D printing manufacturing. Below is some further 3D printing guidance which may help you design a highly successful part for 3D printing manufacturing.
HLH Build Volume: 800x800x390mm
Tolerances – layer thickness is 0.1 – 0.2mm. SLA is very accurate in the x and y directions, meaning models are very accurate to CAD. General tolerance is +/- 0.1mm.
Advantages
Accurate to CAD
Fast build times
No tooling costs
Complex geometries possible
Good surface finish
Drawbacks
Brittle materials
Need support material
Materials
ABS like materials
High temperature
“tough†materials
Transparent materials
Surface Finishes
Polishing
Sand blasting
Painting
Plating & more
Tips & Tricks
Reduce weight to save costs
Add escape holes for resin in closed sections
Fillet walls and pins for extra strength