Design Tips – SLS 3D Printing
To download all our design tips please click here.
November 8, 2008
Now we move into SLS 3D printing design tips as we get near the end of 3D printing week here at HLH. Check out these quick tips below. Also check out our current rates for 3D printing. This is a limited time event 
SLS Rapid Parts @ $o.3/Gram (USD) – FreeQuote@HLHPrototypes.com to start your project review.
SLA Rapid Parts @ $0.25/Gram (USD) – FreeQuote@HLHPrototypes.com to start your project review.
If you are not sure which process is the right 3D printing choice for your next project then our team at HLH will be happy to review your project with you. For now, here are some SLS design tips to help you design an awesome part.
Pins – standard tolerance is +/- 0.3mm so any features with dimensions below this are unlikely to be printed without issue. So pins should be designed ≥ 0.8mm.

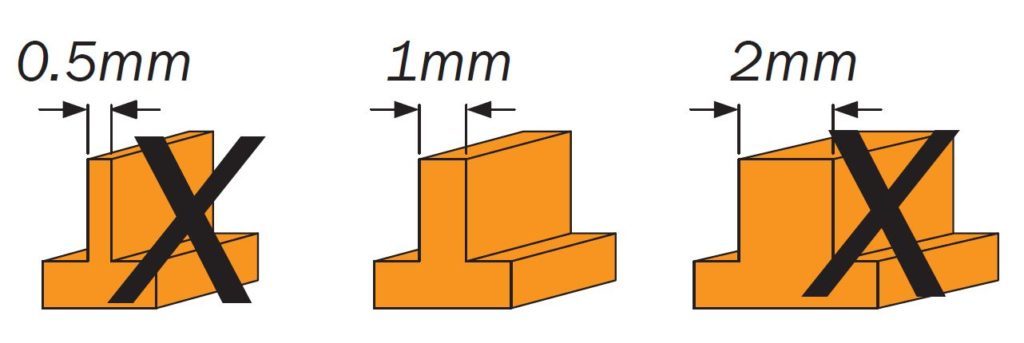
Slots – effected by depth or thickness of the wall, ≥ 0.5mm is minimum but will fail to print if the depth or wall thickness is over 2mm.
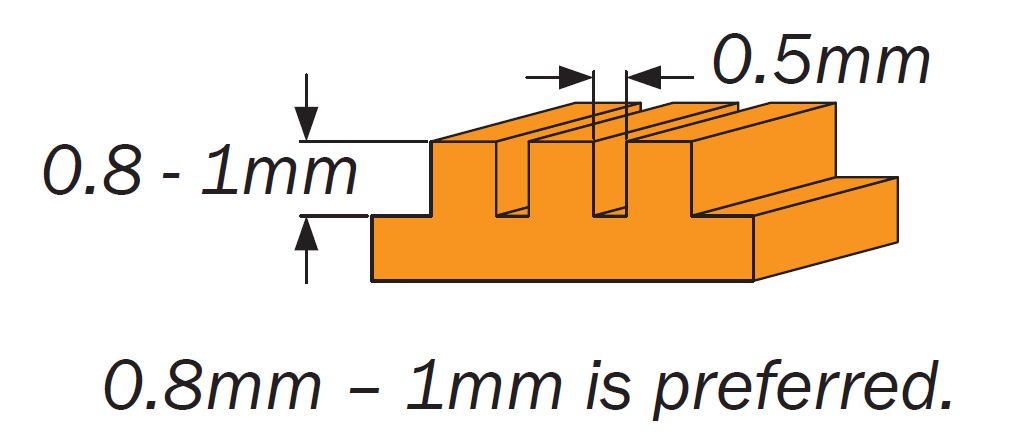
Walls – thicker walls are at risk of warpage. Thin walls can also be a problem area. 0.7mm minimum, but 1mm is preferred.
Follow these design tips and other design tips coming up to achieve a part design that is well suited for 3D printing manufacturing. Below is some further 3D printing guidance which may help you design a highly successful part for 3D printing manufacturing.
HLH Build Volume: 350x350x420mm
Tolerances: +/- 0.3mm is standard.
Advantages
Self-supporting, no support required
High strength parts
Chemical resistance
Biocompatible
Accurate to CAD
Fast build times – No tooling costs
Complex geometries possible
Drawbacks
Rough surface finish
Limited material choice
Low resolution so loss of fine details
Warping
Surface Finishes
Sand blasting
Polishing
Painting
Dying
Materials
PA 12
PA 12 + GF
PA 11
PA 6
Tips & Tricks – hollow parts out with escape holes for trapped materials. Anneal living hinges by dipping in boiling water and work back and forth.