Injection Molding Tips – Part 1
October 31, 2018
Your part design will likely need slight variations depending on the manufacturing process you choose. Each manufacturing process has a set of rules that are unique and should be followed to help save you time, money, and to ensure a much better end product.
We continue injection molding week here at HLH with a couple of tips for your consideration as you are designing your next part for manufacturing via injection molding. More tips coming this week 🙂
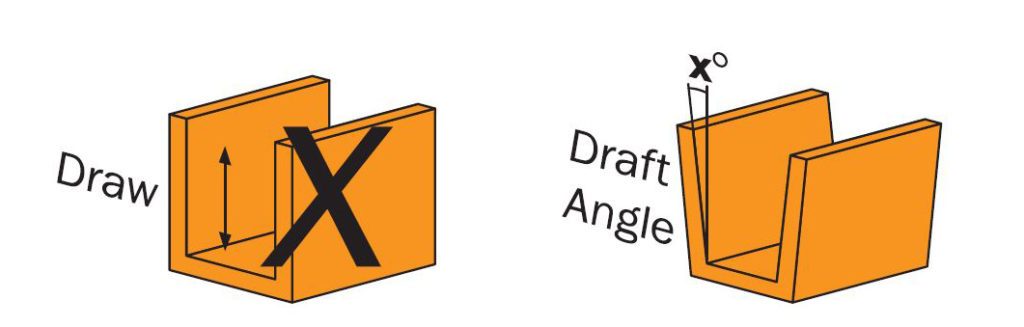
Draft – draft angles should be added to all parts in the direction of draw. Draft prevents surface scratches and damage when demolding and prolongs the life of the tool. Two degrees’ draft + is recommended. There are times that you can get away with less draft but whenever possible try to design with the recommended two + degrees.
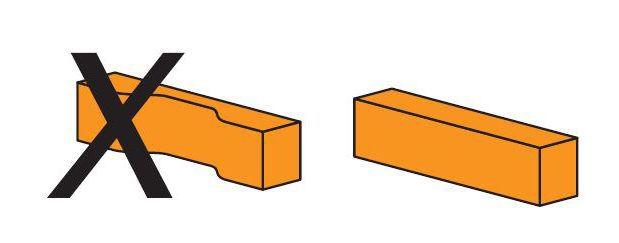
Wall thickness – use uniform wall thicknesses. Walls 1-3mm are recommended for most materials.
Follow these design tips and other design tips coming up to achieve a part design that is well suited for injection mold manufacturing. Below is some further injection molding guidance which may help you with designing a highly successful part for injection molding manufacturing.
HLH Machine Sizes – 80 to 3000 ton
Advantages
Low cost per part
Repeatable
Large selection of materials
Good surface finish
Drawbacks
Requires investment in tooling
Longer lead time to first parts
Surface Finishes
Textured in tool
Coloured in tool
Painted or Plated
Silk/pad printed
Materials
Too many to list. Talk
to HLH to find out
material options for
your project.
Tips and Tricks
Remove undercuts if possible
Specify a lower grade surface finish
Mold in standard plastics – pp, abs etc
Reduce weight of part